A Simple Way to Jazz Up a Bookshelf
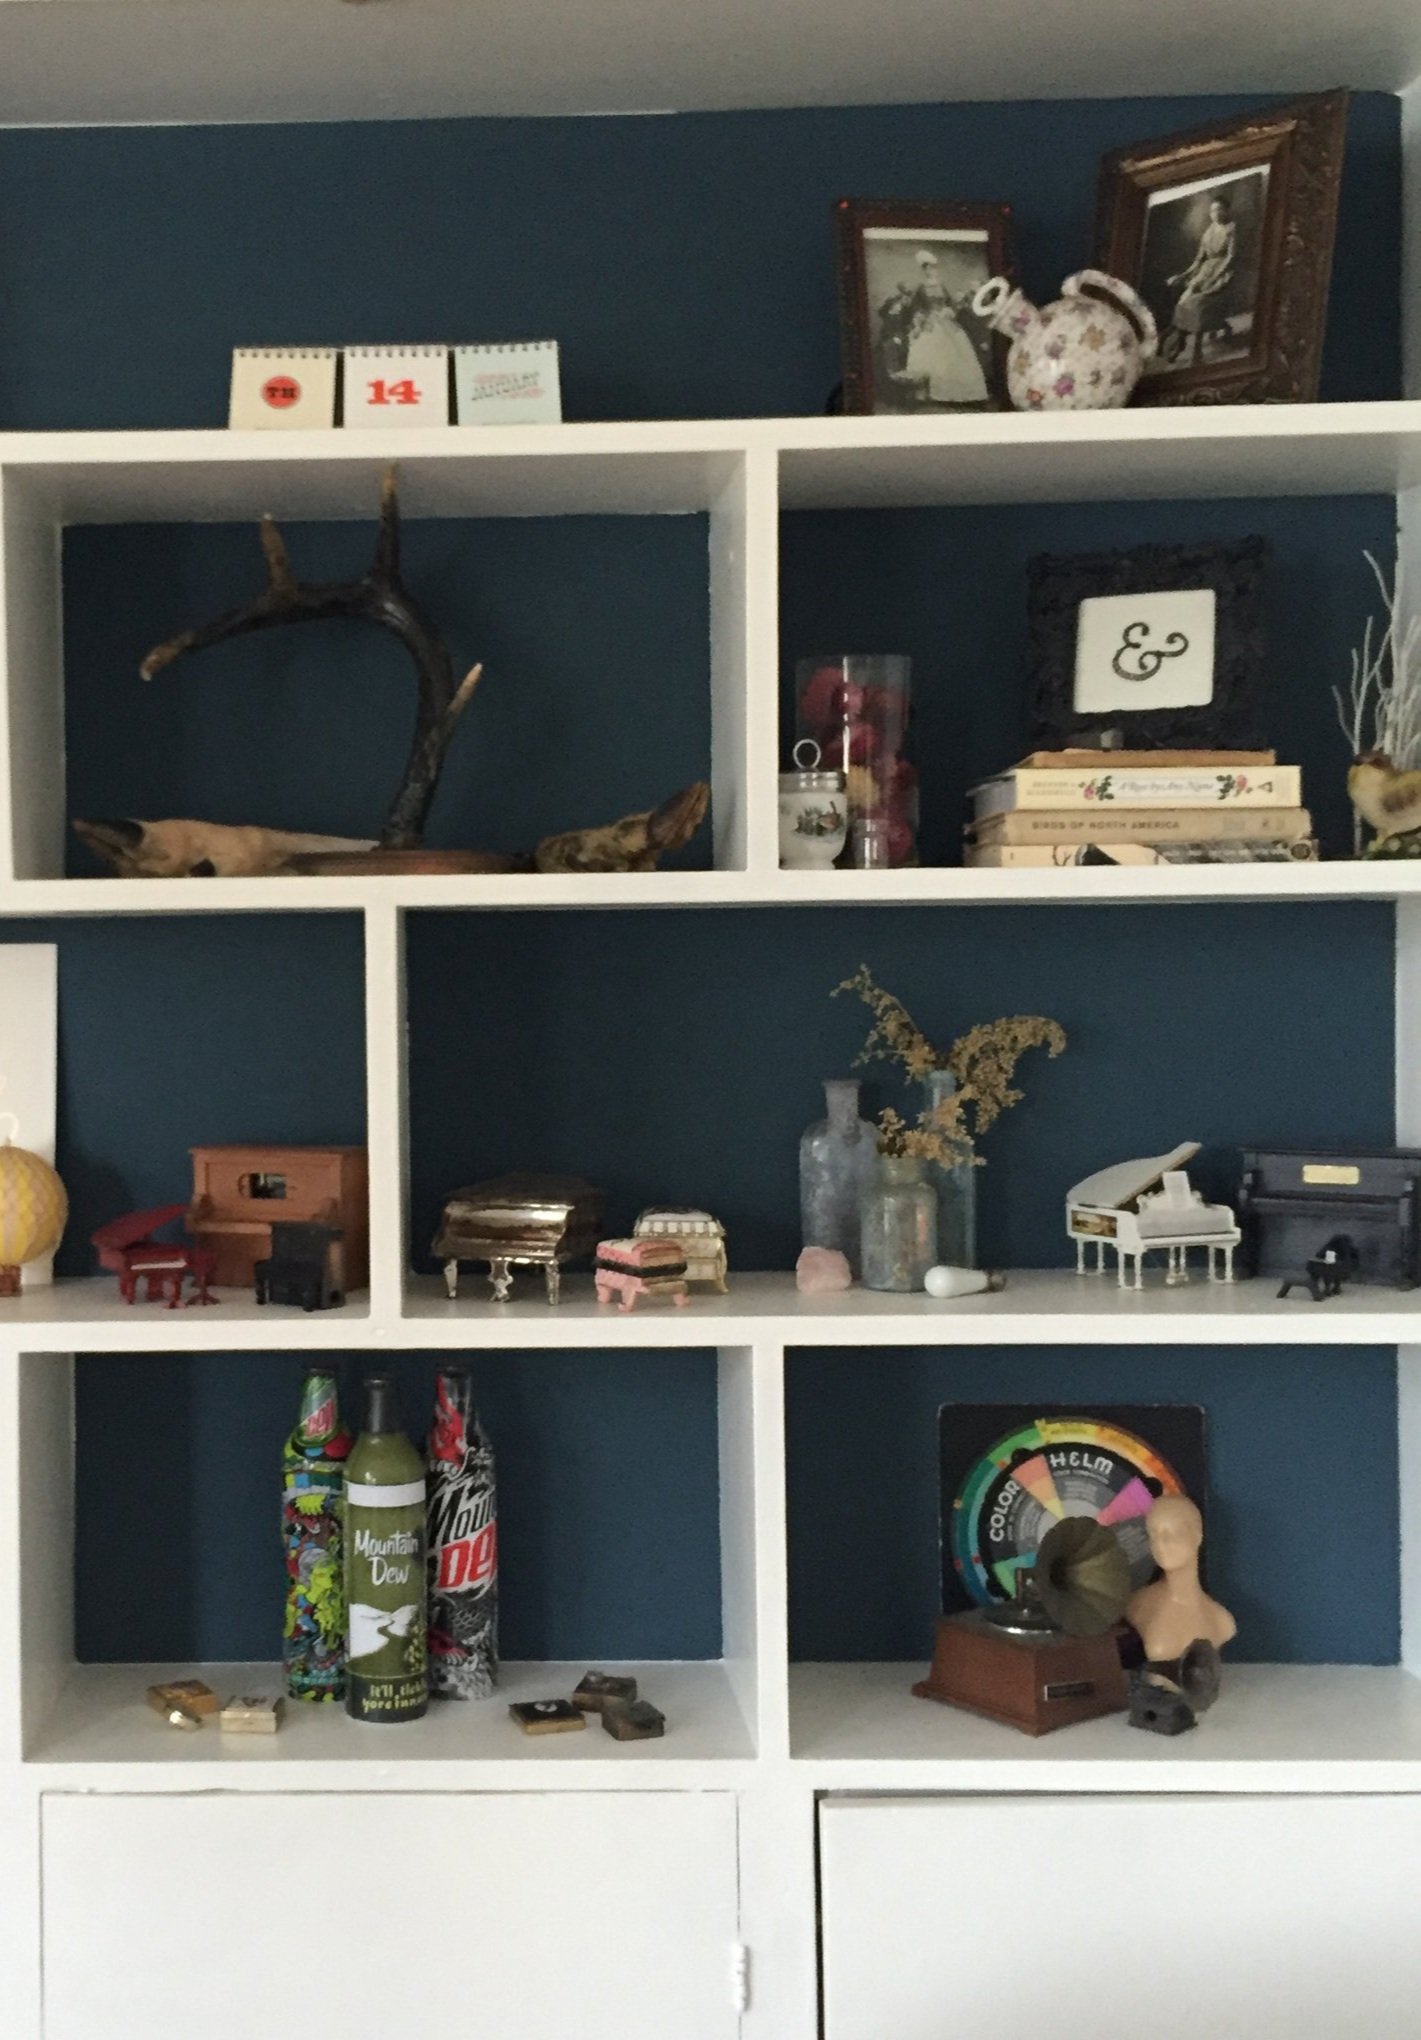
Our living room has this super cool built-in bookshelf that I absolutely adore, because I’m a person with a lot of knick-knacks, and it’s a great place to display them. When we moved in years ago, I had a spare can of this navy blue paint and decided to paint the back of the shelves. It was fun for a bit, but last year I wanted a change and thought a lighter colored wallpaper pattern would be nice.
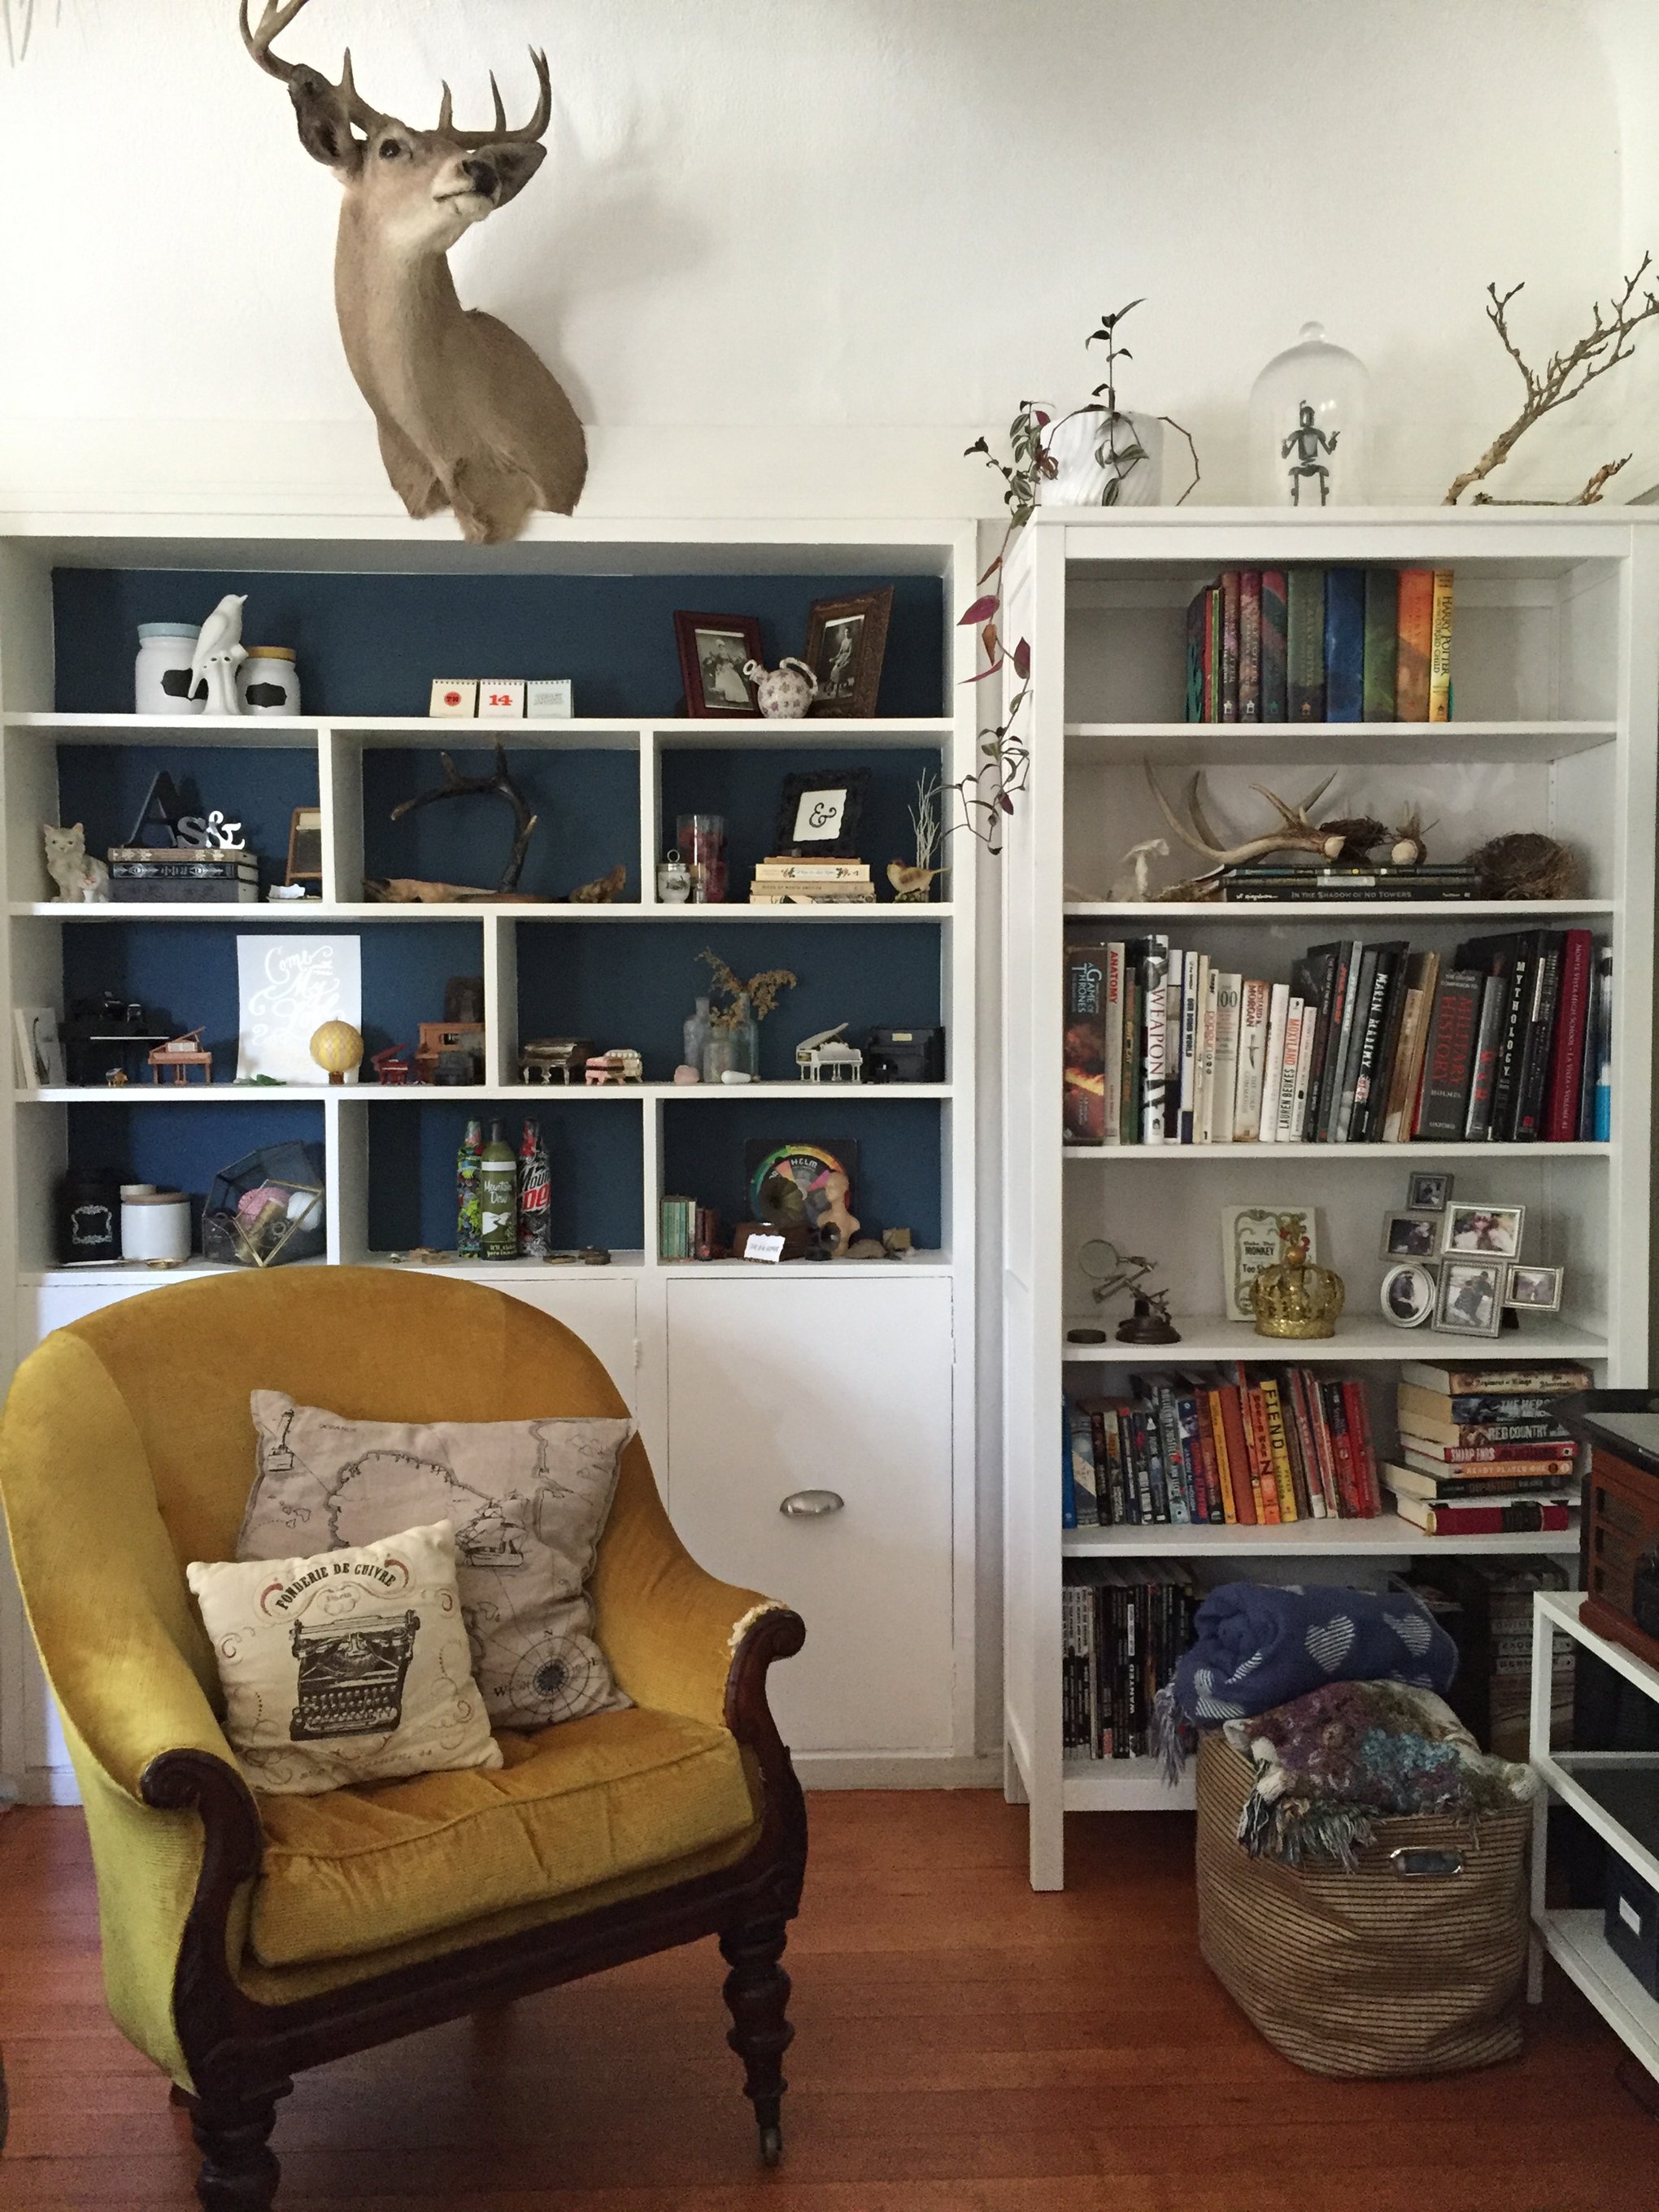
Fast forward to realizing just how expensive wallpaper is, and also how complicated it is to wallpaper this many tiny spaces. I realized it would be much easier to turn to one of my favorite things: handmade paper!
Of course, a bookcase refresh can be done with any kind of decorative paper (wrapping paper on a roll would work really well!). But I’m a big fan of handmade paper because of its organic edges and texture. I headed straight to Paper Source to pick out a pattern - I absolutely love their huge selection of handmade papers, and I love that you can touch and feel them in person.

If you have a bookcase that needs a bit of pizzazz, here are the steps I took for this re-do:
Supplies you will need:
Foamcore (white works best if you have a lighter colored paper)
Double-sided Tape (I used a tape runner)
Ruler/Measuring Tape
Scissors
Pencil
Decorative Paper
Step 1: Measure the internal dimensions of each shelf, and cut the foam board to size with a sharp utility knife (ideally on a cutting mat, but a big piece of cardboard will work in a pinch). Make sure to use a pencil and ruler to mark the foamboard before cutting, for the straightest cuts possible.
Step 2: Dry-fit foamboard - it may take a few tries to get it right, especially if your bookshelf has a lot of different-sized compartments like mine does!
TIP: Place a piece of tape on the foam board to act as a ‘pull tab’ so you can pull the dry-fit pieces out again. Mine were tight enough that they got stuck in there!


Step 3: Turn the paper upside down and cut to size, leaving at least 1/2” on each edge to wrap around the foam board.
Step 4: Cut triangles off the corners of the paper, approximately the same distance away from the edge as the thickness of the foam board (I like to use an offcut to measure).
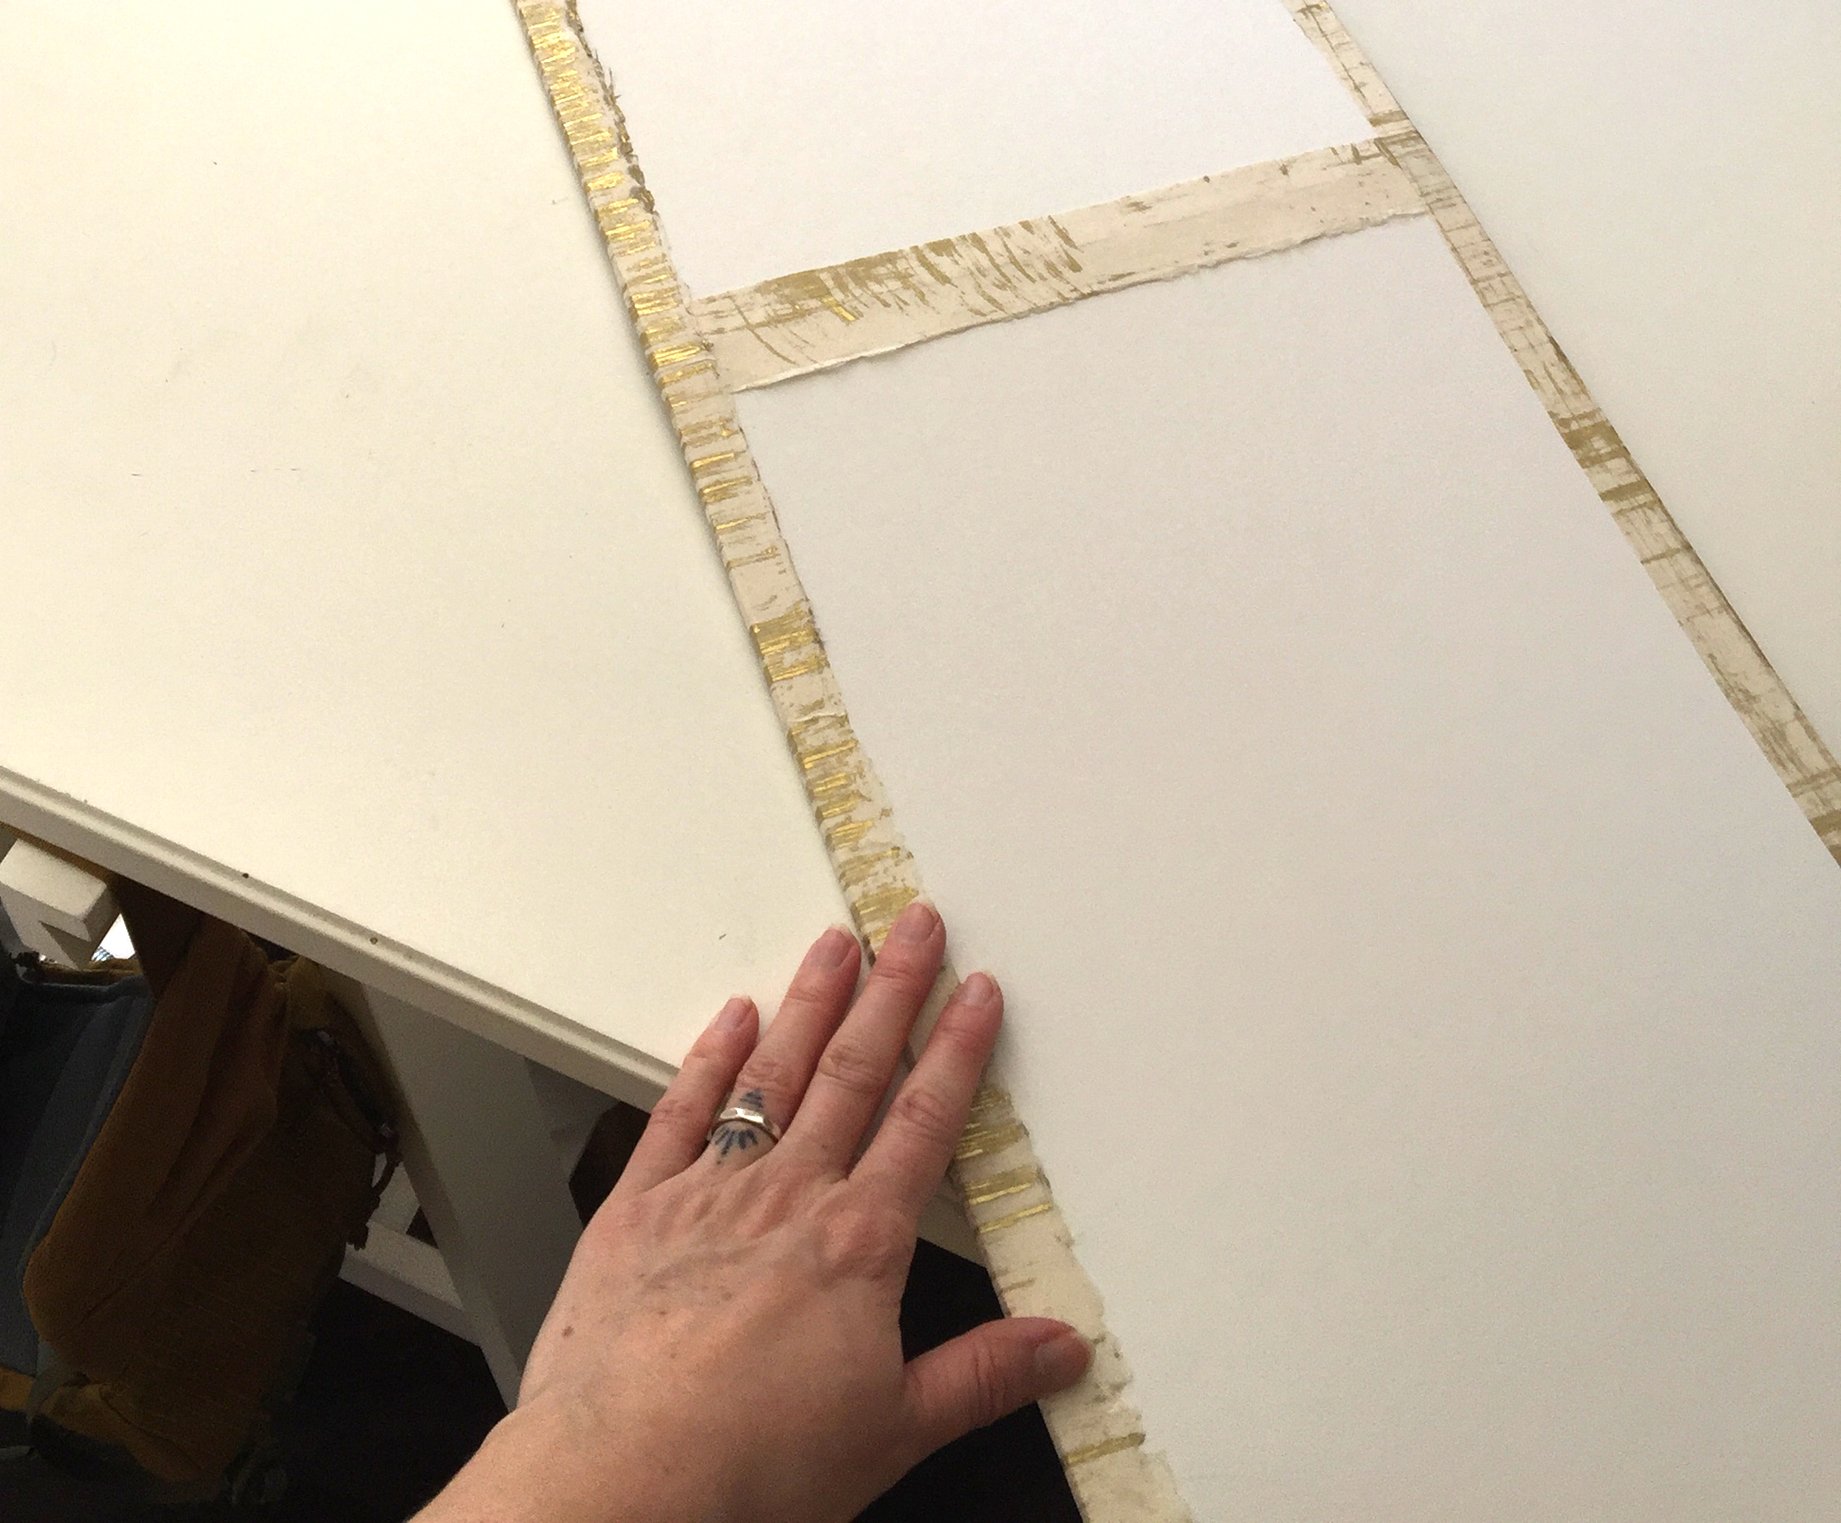
Step 5: Tape! Place an X of tape across the front of the foam board. Then, turn the board over and position onto the pre-cut paper. Put double-sided tape along the back edge of each side, and wrap the edges of the paper over the edge of the board, onto the tape. A bone folder or the back of a butter knife can be helpful to make sure it sticks well!
If you have an extra long shelf (like my top portion) you can use two pieces of foam board, and just overlap the paper on each. This is the benefit of handmade paper - the deckled edges make it so you can’t really see the overlapping seams!


My boards were a tight enough fit that they slid into the shelf and still stay there pretty decently - if you wanted extra security, you could add some double-sided tape to the back of them to help them to stay put. Just make sure not to use anything too strong, in case you want to remove the boards later and update the paper!


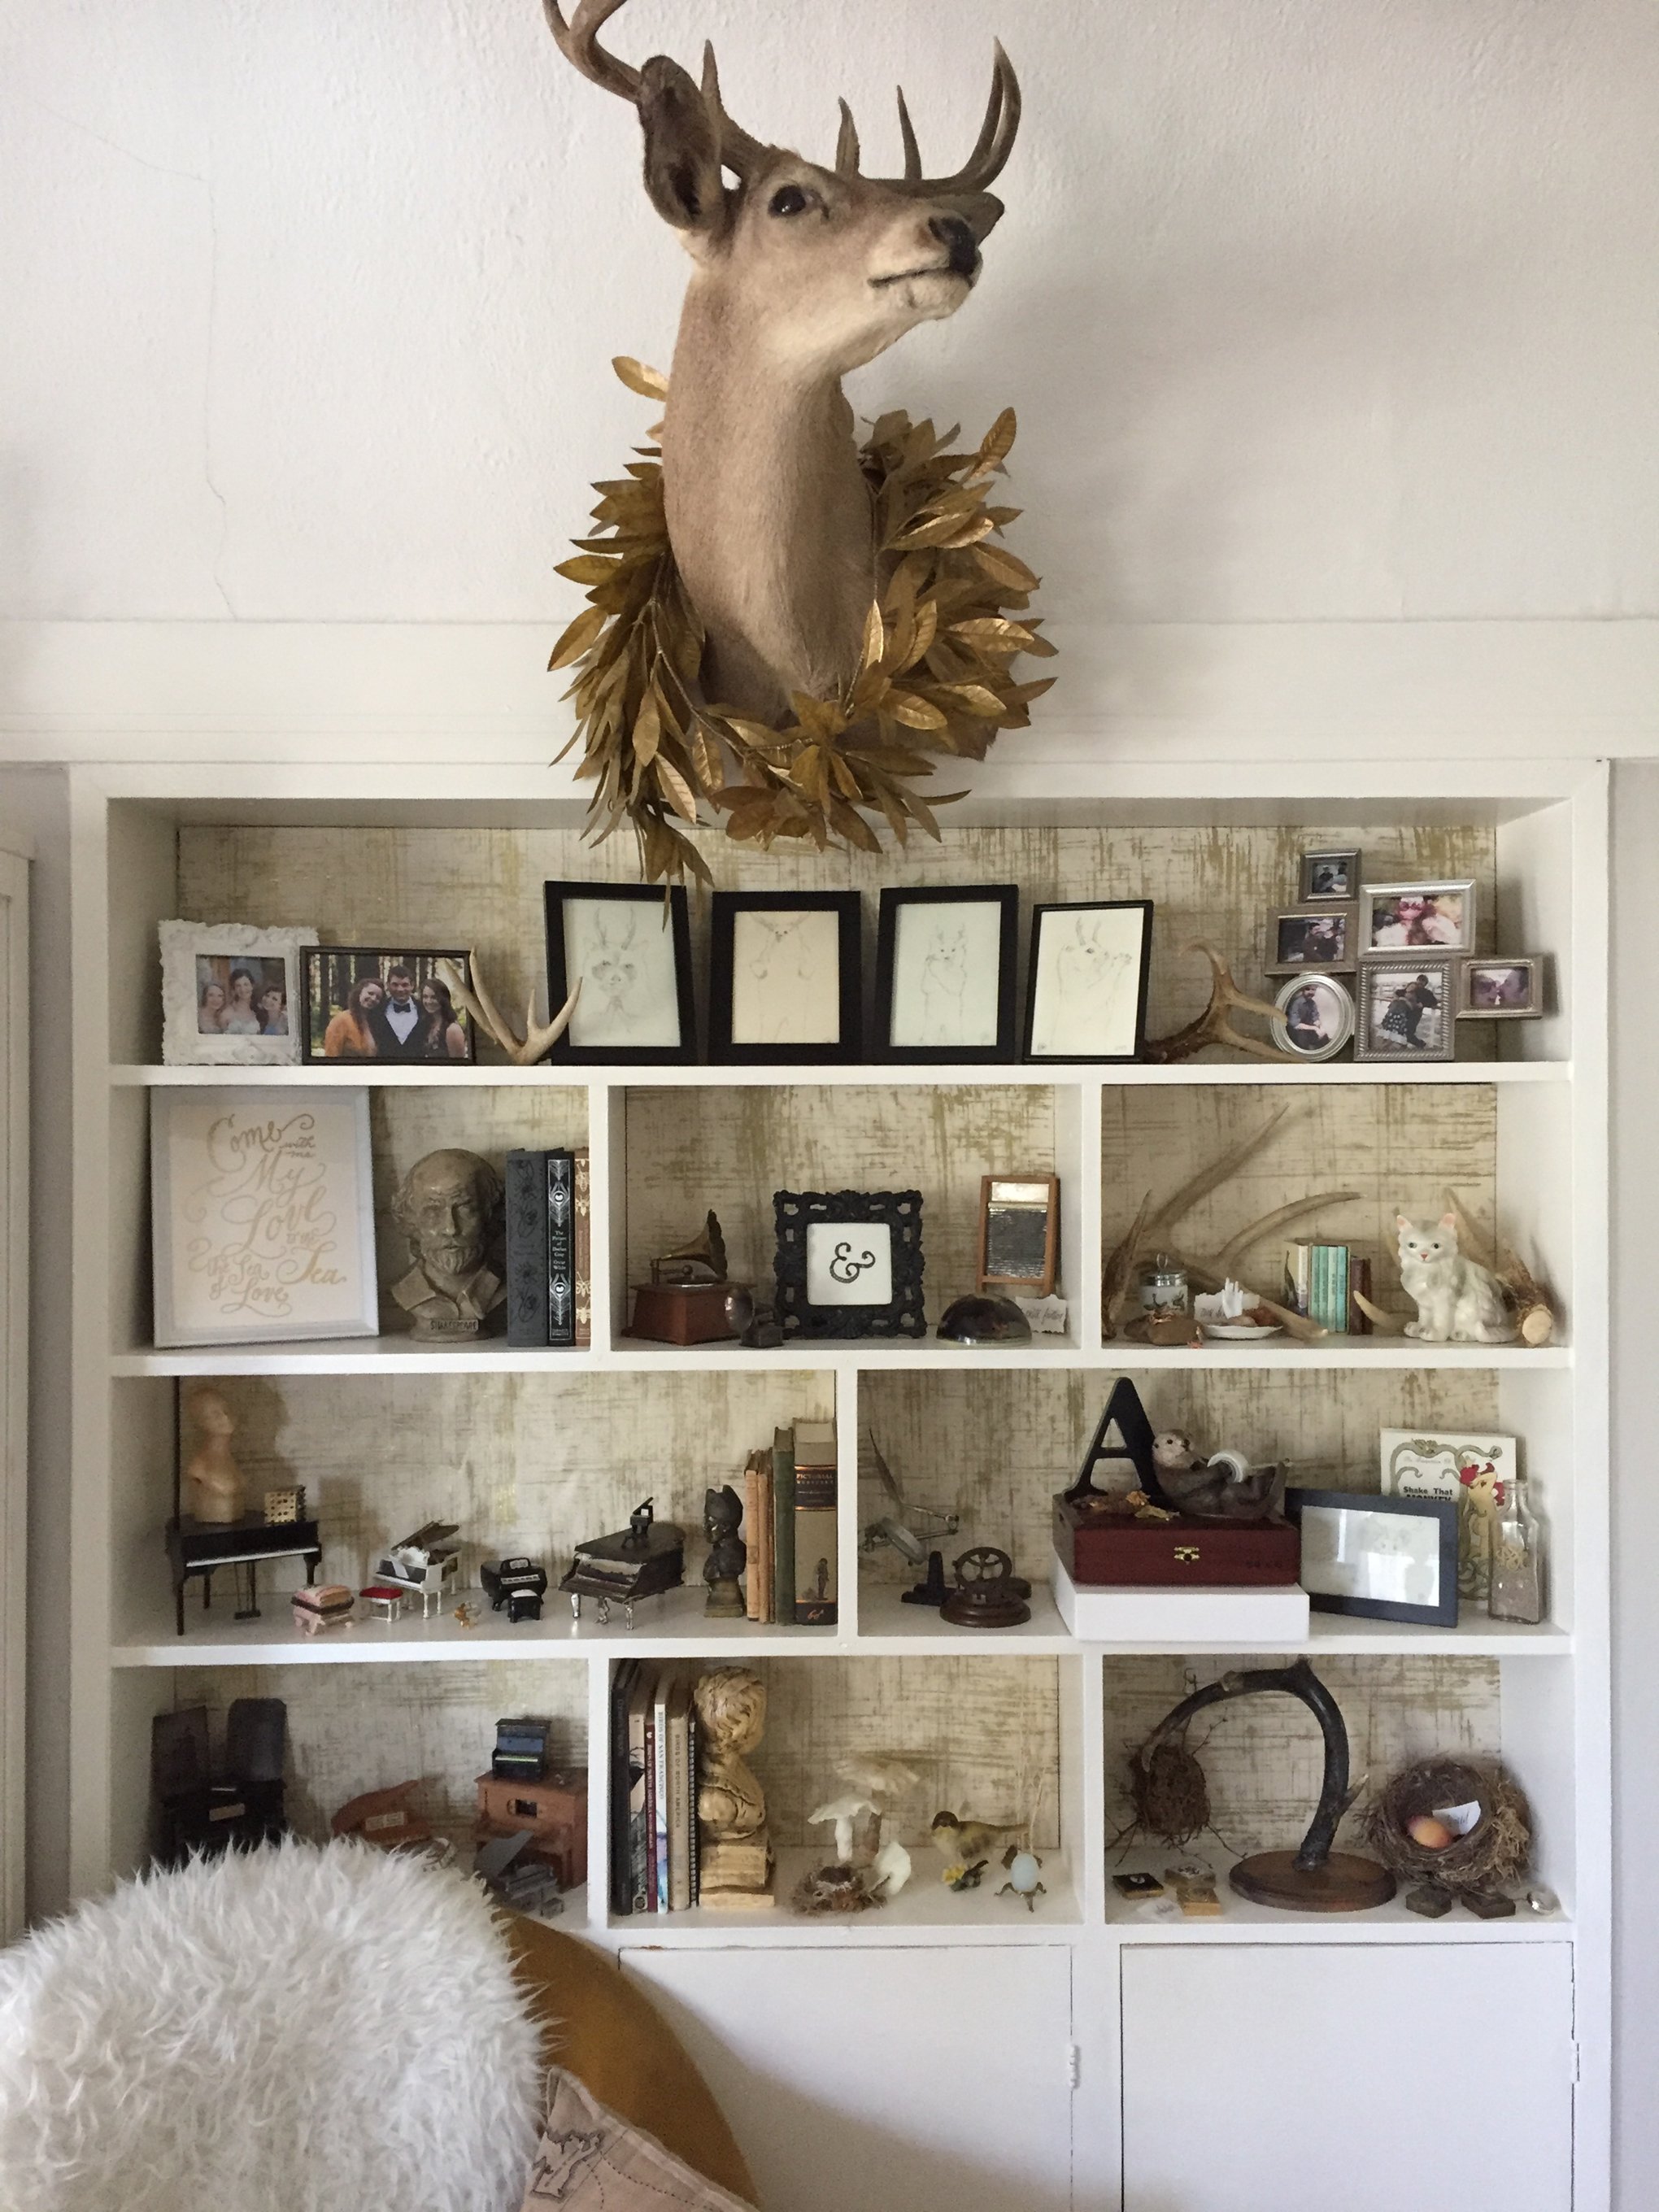
I love how this turned out and it was such a quick easy way to change the look of this space. Do you have a bookshelf you would jazz up with handmade paper?


Code name: Barbie Dream Kitchen